Esstac 556 Kydex Magazine Insert

I receive no compensation for the video or blog post.  I’m posting this because I want others to know more about the product.  Preparedness is very important.


OLYMPUS DIGITAL CAMERA

If you’re like most American patriots you have the desire to be ready to defend your naturally born rights, family and property.  To do so requires owing and being proficient with capable firearms.  Good firearms and training mean basic ammunition load-outs, a way to carry and retain them on your person.

Alice01a (1)

Nylon ALICE LBE post Vietnam

When I first started using load bearing equipment(LBE) it was in the mid 1970’s using ALICE LBE.  ALICE magazine pouches work great but they to create unwanted bulk when worn forward of the lateral midline of the body.  Very much like we see now with the magazines being placed front and center on chest rigs.


IMG_5503

ALICE magazine pouch converted to PALS attached to an Air Force Defensor Fortis Load Carrying System

I no longer use the ALICE LBE unless it’s been converted to the Pouch Attachment Ladder System(PALS).  The ALICE magazine pouches are still on my LBE located in a more convenient place.  Their primary place has been taken by military surplus triple side-by-side pouches.


IMG_6520

Surplus triple side-by-side magazine pouch.

These pouches are fantastic for keeping a low profile but suck for shifting magazines or resupply.  They don’t hold their shape to maintain an opening that would make is easy to place a magazine in them without looking and two hands.  I had considered making some kydex inserts myself but don’t have a shop set up to make them to my quality standards.  That fact left me searching for something commercially made.


IMG_6518

Esstac 556 KYWI magazine insert.

There are several brands and makers out there, the prices vary considerably.  For the price I decided to try the Esstac 556 KYWI.  After several months of use I decided to purchase more.  They have a shape that once placed into the magazine pouch will snugly hold onto popular 30 round magazines such as the Troy and Pmag brands and of course USGI mags.  The insert has the hook part of hook & loop attached  to be used with their brand of magazine pouches and a drain hole in the bottom.


IMG_6522


The insert keeps the pouch open so that I can load the pouch without looking or having to use two hands.  The edges of the kydex are not what I’d call finished.  Meaning raw 90° edges.  At first I thought this might catch the edges of the magazines but it has not.  If it ever gives me a problem I’ll hand smooth them to a desirable angle.  So far the unfinished edges seem to help hold the insert in place.


IMG_6516


I’m satisfied enough with them to have all my triple pouches outfitted with them and a few spares.  Keep in mind that there are different height sizes depending on what you need.  Pay attention if you order some.  They also have them for 7.62 and pistol magazines.  I purchased mine from SKD Tactical however they can be purchased directly from Esstac.


Their use is demonstrated in the video.  I included an upside down shake test like you see in other review videos.  I however don’t plan on pulling off acrobatics in the field by doing somersaults or hanging upside down like a bat.  It has been my experience that the magazines will not dislodge from the pouch when jogging from one position to another or fly out when rapidly going prone.  Let me know if you’ve had a different experience with them or use something different.  -13

BMT Mooner J38-5 Moon Clip Loader

I receive no compensation for this post, this is my personal opinion and experience.  I’m sharing this because I think it may help people be more satisfied with their moon clip equipped revolver.

This post is for anyone with a revolver that uses moon clips.  Loading and unloading moon clips by hand can be a big hassle.  Sometimes simply loading or unloading can bend the clip making it useless.  With the BMT Mooner J38-5 I can load or unload rounds in seconds with a single twist of the device.  It is amazing how well the device works.  I made a video of this model since I couldn’t find one online.

This model is for the Smith & Wesson 5 shot J-frames.  There is another model available for the 5 shot J-frame as well, if you go to purchase one make sure you contact BMT to insure you get the right one.  There are also many more models for various popular revolvers on the market.  The cost for my J38-5 was around $100.00.  I couldn’t be more satisfied with the device.  -13

The link for the moon clip is http://www.bmtequipped.com/index.php

Good People With Firearms #13: Man armed with machete killed.

10JAN2020, Sweetwater Florida, Man shoots man threatening him with a machete.  Dies in hospital later.

Man With Machete Shot and Killed During Music Video Shoot in Sweetwater: Police

Unconditional freedom, no compromises, no negotiations. -13

Elf tells all – Secrets of Bass Pro’s Santa’s Wonderland

This blog post is not endorsed in any way whatsoever by Cabela’s or Bass Pro.  It is my personal experience-opinion and should be taken that way.  All photographs, images copyright Bass Pro.

Sometime early in November of 2019 I received one of the regular email promotions from Bass Pro.  The email had the regular merchandise sales and an announcement for seasonal help in Santa’s Wonderland.  I had no idea what Santa’s Wonderland was about but thought it would be a chance to see what working at Bass Pro would be like knowing the gig would stop at the end of December.

I liked the idea of not having to quit a job I didn’t like if it turned out that way.  Bass Pro was expecting to let me go already with no expectations.  I applied for and got the job.  Official title, Elf.  We were issued red polos, a green apron and a Bass Pro embroidered elf’s stocking cap.  Next on the agenda was setting up part of the Wonderland experience.

SANTA 1e

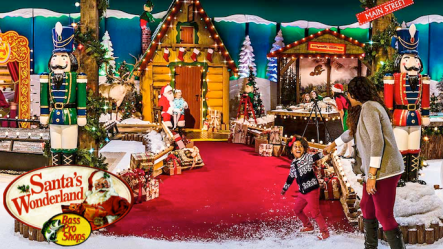
All the elfs set up artificial pine trees complete with lights and artificial snow as well as merchandise displays and play areas.  All said it took about three days to complete.  Once complete Santa’s Wonderland looked very much like it was set outdoors in a snowy forest.  It looked very realistic.  Parents should note that the display is for looking at and not a place for children to play or pose for photographs.

After a day of training on various topics we were ready to open.  Before I share some of my experiences and secrets that future visitors will find useful I should explain what Santa’s Wonderland is.

SANTA 5

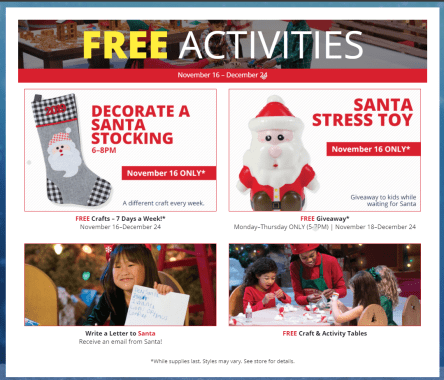
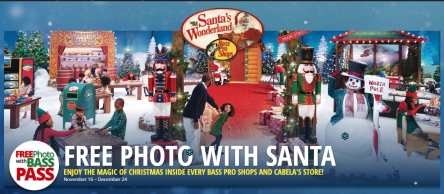
Santa’s Wonderland(S.W.) can be found in many Cabela’s and Bass Pro stores during the holidays.  S.W. is a place where families, children or individuals can have a free photograph taken with Santa Claus.  There are free activities such as crafts at designated times of the day to a coloring area where children can color Christmas themed pictures with crayons or write a letter to Santa which can be placed in a mailbox feet away from the area.  Note to parents, the seating is for children to sit in while they write letter and color pictures, not for parents to take a break.

sec-foamToy

There are also play areas where children can shoot duck targets with a bow and arrow, play in a sand-dirt toy area, shoot targets with a laser “BB” gun, tables with remote control trucks, Lincoln Logs and puzzle blocks and a Nintendo video game area with a hunting and fishing theme.  Plenty of activities to keep children busy while waiting to get a photograph with Santa.

SANTA 2

New this year was the digital Bass Pass system.  In the past years laminated tickets were handed out creating long lines everyone had to wait in for hours at times.  This years system involved registering for a time slot so that there were no long lines to stand in.  To obtain a digital pass an individual has to come to the store of choice, enter a name, phone number and number of people in a particular group.

BASS PASS 1

To use the pass system the phone number used must be able to receive text messages.  Once registered there will be a confirmation message, the next message will be a reminder with an estimated wait time and a final message that says “…it’s time…” prompting the individual or group to the red carpet.  Remember to charge the phone registered and bring it with you as there will be no other way to receive notifications.

BASS PASS 2

The digital Bass Pass does not mean there won’t be long wait times.  The later in the day or season you wait to register the longer the wait time will be.  If you register early in the season you will have very short to no wait.  As the season progresses wait time for minutes turns into hours.  Get there early if you wait until Christmas eve to get your photo you will be in line a long time and may not be able to get one at all!  “The early bird gets the worm”

The whole purpose of the digital pass system is so that there aren’t long lines of people standing in one place for hours.  The digital pass allows one to roam the store, eat at the store restaurant or visit other businesses close by until you are notified its your turn.

The Bass Pass allows the individual or group to obtain one (1) free photograph with Santa.  Participants will not be allowed to split a group up for multiple photographs for only one registration.  If a group wants more that one photo it would be wise to register multiple times for the same day using different phone numbers.  That way the group will be allowed to go through the line again.

With the hundreds and hundreds of people wanting a photo the elves will be moving the line at a rate of about  1 1/2 to 2 minutes per registration.  Due the notification system there should be plenty of time for wardrobe changes, hair and makeup.  Do not get on the red carpet and expect to hold the line up while others wait.  Be ready!

Mothers with infants must have a realistic understanding that a baby whose head must be supported will not pose to look at the camera while the photo is taken.  Mothers with this expectation will be disappointed.  Same thing for young children.  Once the first photo is taken children will anticipate the flash and attempt to look away or avoid the camera altogether.  After taking hundreds of photos I noticed this with all children.

Due to the time constraints one must understand that the free photo is not a photo shoot at a studio.  Elves take three photos quickly, choose the best of the three and print that one photo.  Participants do not get to choose as this would create chaos and increase the wait times by hours.  Another reason why getting there early in the season is important.  Don’t like your photo, register again for another one.

I’m sure that my readers aren’t like this, I post this information so others will understand the elf experience.  The following will put anyone behaving in the described manner on the lead elf’s naughty list and will get individual nowhere, possibly ejected from the store.  Free does not mean one is entitled to a photograph, craft or giveaway item.  Attempting to use any reason to cut line or pay the elves to allow it will only offend them.  Standing at the registration-check in area will not get one in sooner and creates a safety hazard.  People doing this will be asked to leave the area.

Disparaging or nasty racist remarks to or about others waiting to see Santa most likely will have one ejected from the store.  It will really piss off the elves and they will call one out on it.

As a lead elf I was able to see the best and worst of human behavior.  I had a fantastic experience.  One of my favorite parts of the experience was hearing the reasons why others should be allowed to cut line.  Don’t know how I kept a straight face.  Oddly the only people who didn’t like the digital pass system are those who didn’t register soon enough or understand it.  Long time attendees liked it very much.

I’ve mentioned some very useful tips for those paying attention.  Would I do it again?  Yes I would.  I enjoyed the people I worked with and the management supported us well.  That’s all for Santa’s Wonderland hope you found this useful.  -13

Bass-Pro-Santas-Wonderland

Good People With Firearms #12: Church member kills active shooter during services.

29DEC2019, White Settlement Texas, Man brings shotgun to church, begins shooting attendees, gets killed by armed citizen.

Armed congregants kill gunman who shot 2 at Texas church

Unconditional freedom, no compromises, no negotiations. -13

Good People With Firearms #11: Man uses home invader’s own gun to kill him.

12JAN2020, Manatee County Florida, after a home was invaded a resident was able to use the home invaders own pistol to kill the intruder.

Sheriff’s Office: Home Invader Shot Dead With His Own Gun By Florida Man

Unconditional freedom, no compromises, no negotiations. -13

Good People With Firearms #10: Man invades home, gets killed.

22 December 2019, Homeowner kills man during a home invasion.

Florida Man Kills Masked Home Invader In Gunfight

Unconditional freedom, no compromises, no negotiations. -13

Good People With Firearms #9: Armed citizen zip ties fleeing suspect

2DEC2019 Fort Lauderdale, FL Another reason the founding fathers wrote the Second Amendment.  Armed citizen catches fleeing suspect, zip ties him, police arrive.

“We had customers and employees out, that’s when I decided to pull my firearm and stop him,” Sandi said. “I wasn’t really thinking. Training and instinct kicked in. I just did what had to be done.”

Good Samaritan with gun stops car thief running from police


Unconditional freedom, no compromises, no negotiations. -13

Austere Medical: Pressure Canner Autoclave

Note: this post contains affiliate links, proceeds support this website.

This blog post is not in any way to be considered as instructions or advise.  It is so others can see how I do it.  Individuals performing any of the following do so at their own risk and assume all responsibility and liability for their actions.

eye of the storm image from outer space

Photo by Pixabay on Pexels.com

In South Florida we have the potential to be without electrical power for long periods of time after a hurricane.  One hurricane left us without power for 3 weeks.  That potential left us asking, how would we sterilize medical instruments without a commercial autoclave in austere conditions?

With that in mind I set out to see if I could purchase or construct an autoclave that did not require electrical power to operate for under $200.00 dollars.  At first I found electric autoclaves that were priced $700.00 dollars and up.  Those were out of our budget and electric which wouldn’t be very useful for the situations we envision using an autoclave in.  There were non-electric stove top units for $300.00 up to over $600.00 dollars.

The $300.00 dollar unit was only 9.5 quarts much too small for large instruments or packs.  300 seemed like too much for such a small unit.  I was somewhat disappointed that there seemed to be few options but the commercially made out of budget autoclaves.

Not satisfied with that I started searching for possible ways to construct a homemade autoclave out of readily available materials.  That search led me to this PDF document titled “Use of pressure cookers for sterilization of clinical instruments” found here Link to original location for experiment inspiration.  The paper refers to a study conducted by the Dental School of the University of Texas Health Science Center at San Antonio in 1997 which evaluated pressure cookers for their autoclave capabilities.

After reading that paper I decided to try to find the 22 quart pressure cooker/canner mentioned in the paper.  I was able to locate a Presto 22 quart model 0178003 on ebay for $59.99.  It was in excellent condition.  All of the gaskets were changed including the over pressure plug for safety.  It also seemed to be good idea since gaskets were mentioned in the document as a potential problem point.

GAUGE

All-American gauge left, Presto gauge right, brass pipe fittings.

Also added was an All-American autoclave pressure gauge.  Since there isn’t anyone local to test our pressure canner it seemed like a good idea to add a pressure gauge that was made to be used with an autoclave.  I also wanted to keep the original gauge and see how they compared during testing.  To do this 1/8″ brass pipe fittings were added so that both gauges could be monitored during a sterilization cycle.

legs

3″ stainless steel screws for legs.

After installing the gauges, gaskets and seals I installed 5 stainless screws on the cooking rack that separates canning jars from the bottom of the canner.  I left the rest of the rack untouched.  During testing all of the packs came out wet.  The rack had a few large holes leaving a lot of surface space for water to accumulate.  To give more drainage the entire surface of the rack was perforated by drilling as many holes as I could without compromising the integrity of the rack.

After several tries the packs were still wet where the water wouldn’t drain off.  I thought it might be there was still too much surface and surface tension to release the standing water.  Also during those test I realized I needed something to prop the pouches and packs against so there would be room for the steam to pass and give the ability to add more instruments.

Asset203(1)

Stainless grill grate.

Another thing considered was that maybe the aluminum was cooling before the water had a chance to evaporate.  I started searching online for a stainless steel cooling rack or grill grate.  I found a 10 1/2″ stainless round grill grate on ebay.  Also needed was something to separate the packs and pouches.  I ordered a length of stainless steel wire online, wrapped it around something which I can’t remember to coil the wire to the shape I wanted.  That piece of wire would push into the grill grate in several ways to accommodate the various pack/pouches.

RACK:WIRE

Grill grate with wire coil.

Also during that phase of testing I noticed that once the cooking/drain rack was loaded with packs there was no way to remove them without touching them before they had a chance to cool down.  I had a short piece of aluminum flat stock laying around so that was bent into a handle shape then attached to the cooking rack.

HANDLE

Cooking rack with attached handle.

The information in the document mentioned the success difference between the 15 psi and 20 psi pressures.  It seemed to me that the preferred pressure would be 20 psi since the document on page 6 stated “No positive cultures were evident in any ampules processed at the increased saturated steam pressure for 5, 10, 15 and 20 minutes in all vessels.”

RACK IN AUTOCLAVE

Cooking rack, grill grate and wire coil

3 piece

3 piece pressure regulator

A 3 piece pressure regulator was purchased to use for parts to add to the regulator that came with the pressure canner.  To achieve the 120 grams as the document mentioned one of the weights from the 3 piece regulator was added with 2 washers.  The pick up knob was modified to accommodate the washers so that they would stay centered on the regulator.

After multiple test to assure dry packs and a consistent pressure of 21 psi it was time to see if the modified canner could function as a successful autoclave.  Mail in spore test containing Geobacillus stearothermophilus from Mesa Labs were ordered to determine if packs had reached sterilizing conditions.

Instruments were packed in commercial pouches, muslin and CSR wraps to determine if they would interfere with the process.  Packs were packaged tightly to make it as difficult as possible for steam to penetrate the pack to the place where the test were located.  I was trying to get the process to fail.  It never did.

SPORE TEST

Spore test results

Test results for the thickest pack passed 2 times.  The other packs and pouches passed as well.  That’s still no guarantee that the packs are sterile.  Anyone who processes packs knows that the only place we have any certainty of sterilization was where the test strip was located everything else is assumed to be sterile.  I feel confident that sterilization conditions were sufficient throughout the canner so much so I’ve added it to our aid station equipment.

Since there were no specific instructions mentioned in the document I used the instructions for the All American autoclaves.  After multiple test conducted I noticed that instead of the 15 cups recommended in the document I was able to use as little as 11 cups but added 12 cups to ensure the cycle wouldn’t dry out.

The steps I followed, also our standard operating procedures(SOP), are the following:

  • After the canner is loaded with the 12 cups distilled water and the packs the heat source is set to high to bring the water to a rolling boil.
  • Once boiling and there is a steady stream of steam venting from the vent pipe a timer is set for 7 minutes
  • After the 7 minutes the pressure regulator was placed on the vent pipe.  The pressure is allowed to reach the desired 21 psi.
  • When the pressure reaches 21 psi the pressure regulator is removed to allow pressure and steam to escape for 4 minutes in an attempt to evacuate all ambient air which may not sterilize if trapped in the canner.
  • After the 4 minute venting cycle is complete the pressure regulator is placed back onto the vent pipe.
  • When the pressure on both regulators reaches 21 psi the heat source is turned down to maintain pressure throughout the sterilization cycle.
  • After the heat source is turned down a timer is set for 5 minutes.  During this time the pressure is monitored to ensure it does not go over 21 psi.
  • Once the pressure is assured a timer is set for 35 minutes to ensure that all parts of thick packs are sterilized.
  • After the sterilization cycle the packs are removed and the canner is emptied of water.
  • The packs a placed back into the canner on the heat source set to low to start a dry cycle of 35 minutes.
  • Once the 35 minutes have passed the packs are removed and allowed to dry for 6-8 hours.
  • After the packs cool and vent any residual moisture they are placed into plastic pouches and vacuum sealed to preserve the sterility.

SOP’s also include when using a new heat source running at least 3 test to ensure consistent pressure throughout the cycle.  We use indicator tape as well as test strips to indicate a cycle is successful.  Project cost for the canner, replacement parts and parts for autoclave use was $170.13.

Dangers are explosion if safety features are modified and severe steam burns if a heat protective glove is not used when placing or removing the pressure regulator weight.  This type of autoclave must never be left unattended and the pressure must be constantly monitored for consistency and safety.

We have a working autoclave for austere conditions!  Now we can sterilize instruments wherever we have a consistent heat source whether it’s in our back yard after a hurricane or in a remote location far away from help.  -13

Link to additional information about pressure cooker autoclaves

Check out this 20 minute video about our pressure canner autoclave.


Good People With Firearms #8: Robber points AK in guys face, gets shot.

26NOV2019 “and I am not going to go out like a punk. So I emptied my Glock in his chest. This man tried to get in my van while I was sleeping and he was surprised to see what I did.”

60 year old NRA member and concealed carrier kills man who stuck an AK-47 in his face.  Got to love living in South Florida.

Miami Man In Van Guns Down AK-47 Wielding Robber Because He Didn’t Want ‘To Go Out Like A Punk’


Unconditional freedom, no compromises, no negotiations. -13

Worm bin notes: Update 25 Worms love avocados!

Bins 2 & 3, Update 25.  When opening both bins I noticed the moisture was higher under the cardboard covering.  The spiders seem to have been wiped out by the lizard visits.  I didn’t see any in either bin.  The small white dot insects are still in both bins in abundance seems like the moisture helped.  I’d would like to try to capture a few one day and look at them under the microscope.  They’re so small they look like tiny moving white dots in the bins.


b2-oct-29.jpg

Bin 2 Oct. 29th

B2 NOV 16

Bin 2 Nov. 16th

The other unidentified insects are also there but no as many as before.  The heat may have been too much for them.  Bin temperatures were 72.1° F. – 72.5­­° F.  The ambient temperature was 72° F with 56% humidity.  I watered both bins to get the moisture up at the surface.  The hand sprayer sprung a leak because I left it under pressure and in the sun.  Looks like its time for a new one.  I used the 1 gallon garden sprayer as a substitute and may keep using that instead of the hand sprayer.  I’ll use it next time and see how it goes.

b3-oct-29.jpg

Bin 3 Oct. 29th

b3-nov-16.jpg

Bin 3 Nov. 16th

One thing is for sure the worms really like the avocados.  As long as they are not rotted or dried out they devour them.  I still think their favorite is the mangoes and fresh greens.  It seemed like the cardboard cover is thinning out I’ll add more next time I check the bins.  -13

Latest video below.


Good People With Firearms #7: Constitutional Carry, Stillwater Police Dept PSA

The Second Amendment already guarantees the right to be armed whenever, wherever.  However unfortunate in these days of anti civil rights gun control zombies a public service announcement is a necessity.  All American citizens, police departments and serving officers need to understand and abide by what is presented by the Stillwater Police Department.  To those with an irrational fear of firearms or the desire to take away another human beings self defense capabilities, start here you need it.

What you need to know about the new Constitutional Carry Law

Unconditional freedom, no compromises, no negotiations. -13