From the Laboratory of Insane Schemes. ALICE military surplus has been my load bearing choice since the mid 1970’s. Not perfect for sure but it was a great place to carry my canteens and other items that would fit into ALICE 30 round magazine pouches. Cut off the grenade pouch and they fit together nicely on an issue pistol belt.
Moving into the 2000’s. After checking out some of the PALS / MOLLE surplus available I decided to change over. Although the webbing can be hot and heavy the PALS way of attaching pouches or attachment of any kind to LBE or packs is a good one that almost makes the attached item a part of what it’s attached to.
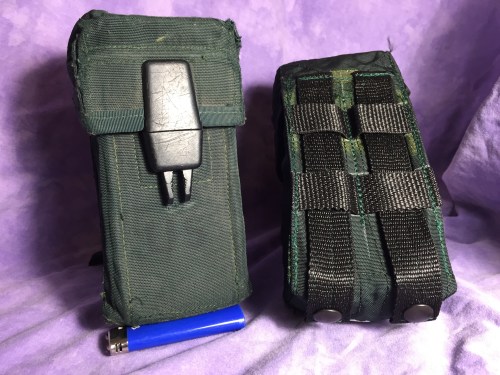
Moving forward left unused canteen and ALICE magazine pouches packed in boxes and me wishing I had a better way than the adapters made to use ALICE on MOLLE. The adapter still leaves the pouch flopping around like its on a pistol belt. Not a very good solution.
I had the idea recently after a resupply to take apart an ALICE magazine pouch and see if I could convert it over to a MOLLE pouch. If it would work it would fit perfectly on the space fillers on the DF-LCS rig elastic section I’d made from a zippered FLC purchased to salvage for parts.

Inside view of FLC adapter/filler and “new” MOLLE magazine pouch attached.
First I had to figure out where the attachment straps would be placed near the top of the pouch and where to snap it on. At the top I chose the hinge point for the lid so it wouldn’t interfere with access. Snaps on the bottom. When the snaps are on the back of the pouch they tend to push it out due to the bulk of the snap. If snap popping becomes an issue they can always be changed to lift-the-DOT. We’ll see what happens in the future.
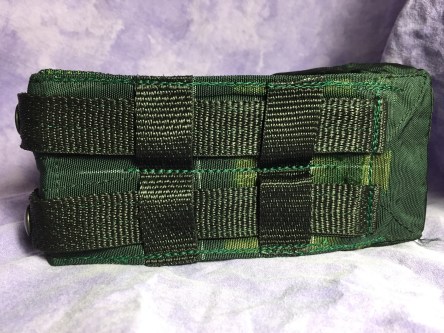
Finished pouch.
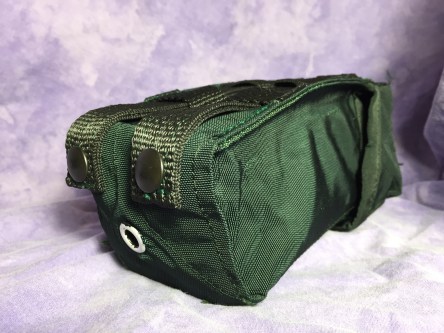
Location of snaps
The web straps were the same length. Doubled, folded in half and sewn together. Measuring the magazine pouches for the PALS webbing I discovered that the pouch width could vary as much as a 1/4″ between 4 pouches. I chose the widest width and cut all the pieces that size. There are no actual dimensions in here because the variation in pouch width, measuring devices and points of measurement may not be the same as mine. Duplicating it exactly may cause problems.
After lots of seam ripping and thread picking the pouch was in half and the ALICE webbing was removed. Laying out the PALS is as simple as can be 1″ x 1 1/2″. Since the pouch is so small I sewed a center line and the edges like I’ve seen on some issue pouches. Sew the straps to the hinge point. Keep it simple.
Although the snaps used and the Pres-n-Snap are designed to cut through the fabric without punching a hole, I did punch because the amount of pouches were small and I wanted more precise location of my snaps. I’ve had puckering and slight movement of the snap post under pressure from the hand press that the finished snap was visibly off mark times I haven’t punched a hole first. It’s also much easier on the body with a hand press if the hole has been punched.

With the holes punched and the webbing sewn on, the stud part of the snap was installed on the bottom of the pouches. I try to leave them until the end of the project or leave them off for as long as possible. In the past I’ve put them on early thinking I’m saving time but they were in the way of the sewing machine on many occasions or were scratched up.
Once the snap half was in place the pouches could be sewn back together again. The top and bottom received four stitch lines and the whole side of the pouch received two stitch lines. That complete, the other half of the snaps were installed on the web straps and that was it. Those are the steps I took to convert ALICE to MOLLE. Now I have some of my favorite pouches to use again. There’s a video below of the process. -13
Materials used: Mil Spec DOT snaps, poly webbing, sunbrella thread.

Pingback: Defensor Fortis LCS PALS Filler Panel | Unit-13 FREMSLT