Note: this post contains affiliate links, proceeds support this website.
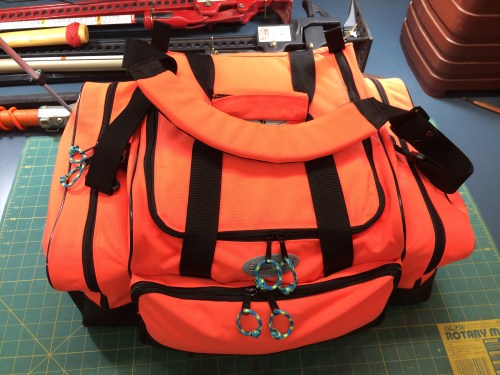
I finally got around to finishing this bag and making a video! On June 3rd of 2016 I posted a product review video of the Mega Medic bag. At the time it was sitting empty, we had decided our medical supplies and equipment needed to be changed and updated based on how the use of the kits evolved over the previous 5-8 years. Most of the kits had been used out of a rescue truck for a project we were working on.
When I made the review video I gathered various medical items that fit into the different parts of the bag to demonstrate the possibilities of what could be kept there. The items shown weren’t a set up ready-to-go kit. I already had a list for the kit contents but didn’t have everything I wanted. Some of the items on hand had reached it’s useful life.
Recently after reading a video comment on the kit I had never seen before I checked to see what was needed to finish this kit. Triangle bandages. That was all. Trying to keep track of medical inventory without a computer may put me in a straight jacket. After replacing and restocking items the kit was finally ready. How is that for a swift kick in the pants?
B Compartment
The kit is an extension of the aid bag. This is considered our Trauma Kit and builds on splinting, bandaging, eye, dental, large wounds, burns. Can be resupply or used as is. It is based on several kits from past experience. It may be hard to imagine but nearly every item in this kit could be expended on one incident.
Some of the kits from the past using the same bag had more of the bandaging and splinting materials. Those kits had been based on, in part, by proximity to a military base and a direct flight path where helicopters and transport aircraft that could hold hundreds of soldiers could and sometimes did go down.
Then there is the, being the only one there and no one is coming. To the rural 20,000 person county, only 5 people qualified to operate two ambulances with the nearest mutual aid unit 30 minutes away, no air support. Standing there after a mass casualty incident looking around and seeing empty aid bags and bandaging supply wrappers among the carnage leaves a lasting impression.

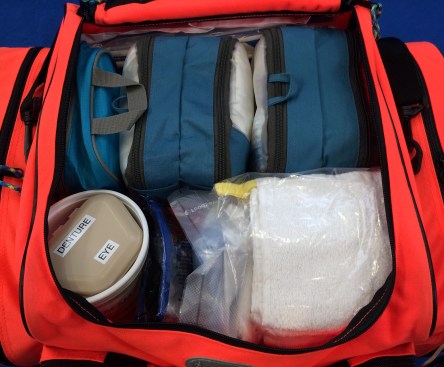
Alpha compartment, why we use those pouches
During the same time we were updating our kits we were able to find several different type packing organizers on sale at Marshalls store. After using a few of them we went back to that store and many others within our local area and bought whatever stock they had in the store.
Those finds allowed us to keep items protected in ziploc bags and create mini kits without having a kit full of ziploc bag mess. Multiples of one type item or a kit made of several different components they’ll work well for many common items.

Double side bandaging pouch (Go Travel Packing Pouch no.3)
The bag above was one of the last pouches found. As it’s packed it works very well, 8 rolls Kerlix, 12 5×9 Surgipads, 20 4×4 sponges. I’ve looked for more and can’t find them. The pouch below is what was used before we found the pouch above. The dressings were packed the same way they are shown, the Kerlix was packed like the double side pouch, 8 rolls in a ziploc bag.
The smaller pouches have items like tape, self adhesive, triangle and elastic bandages. The bandage pouches are very handy for bandaging purposes or resupply. Glad we found them when we did.

Single side bandaging pouch (Travelon Packing Organizers Set-Small)

CD Case
I’ve been looking at ways to store the instant hot and cold compresses for years. When the portable CD cases became available I found out they worked well. If the internal storage sleeves are removed there is room for two instant compresses. All I had to do to get this type case to work was remove the sleeves from the rivets that were simple to pull out by hand.
At first I used a metal case but it added weight and was too stiff to fit in multiple spaces. When these softer type plastic cases became available I tried one. Discovered that I liked it better. It has more flexibility and can fit into tighter spaces than the metal case. For the type of compress and CD case chosen its simple to get them into the case. First, I arrange the liquid part of the compress in one half of the bag and the dry ingredients in the other then, fold in half.

Case open showing how compress is packed
Place both compresses in the case then close it. As shown below it works good. The compress is protected from punctures and abrasion and it’s easy to see the contents. I usually look for things like this at the outlet stores but ordered these off eBay for consistency.

Case packed with 2 compresses
This kit has one 18″ and two 36″ SAM splints that can be used in many different ways and can be custom cut with the trauma shears. Very handy to have on hand. They beat the old ice cream scoop, vinyl covered wood, blow-up doll, waxed cardboard splints any day.

FareTec CT-6

REEL Splint
The two photos above show the traction splints kept in or with the trauma kit. The FareTec and the REEL splints are surplus finds. If you’re looking to stock your kit check out eBay and the surplus stores. Make sure all the parts are there before you buy, get new if at all possible. Couldn’t give a price on either of these. eBay as I shockingly found out only keeps auction records for 3 years not a running tally like Amazon.

Dental / Eye Kit
In the photo above are the contents of the dental and eye kit. The denture case can be used for dentures, loose teeth or prosthetic eyes. There is a scleral cup for removing contacts and prosthetic eyes. A case for contact lens and a 10x magnified mirror.
Two eye shields and two food service 16 ounce deli cups for covering injured eyes. Those things can work well for keeping eyes protected. Some of the eye injuries I’ve seen makes me want these in stock at all times. Not shown are the sterile eye cups, the Sal-jet rinse 30ml saline vials or the Refresh Plus eye drops.
Most items in the kit have multiple uses. Dressing like the trauma and surgipad make good splint padding. The surgical CSR wraps in the kit to make clean working space can be used to protect wounds. A mylar blanket as an occlusive dressing. The list is endless.

Security Sealed Kit
Security seals are an important part of our medical system. The seals are tightly controlled and numbered. A strict system is in place, only a couple of people here are allowed to seal a kit. That way when one of the kits need to be used and the seal is intact we can be assured the contents will be there.
The seals used in the video are not the same seals used on our bags. They’re from old stock and are used for training. They work the same as fire extinguisher seals, twist or pull on the seal and it will break easily. If you get some, get numbered if possible it will help in case someone else has the same type/color seals.
A word of caution, be careful where they are placed on zippers they can break zipper parts easy.
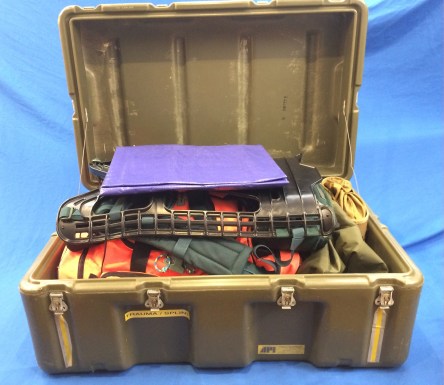
Hardigg AL3018-0905
The Trauma Kit is kept in a cabinet or could be stored and transported in a heavy duty case with the REEL splint, a MOLLE 2 pack frame, various color pack covers, a quick litter in a dump pouch and a small tarp to place the contents onto. The case is stored with the gasket out, if left in place it compresses under the weight of the other cases and is not as effective over time.
Seems like that covers the items I felt I left out of the video. I don’t want to repeat the video here. I would rather people watch the video, then read the blog after to see what was left out. Clearly I don’t write scripts for these videos, just an item name, maybe a note. If there are any changes or updates in the future they’ll be posted. The new video is below. -13
Other video project featuring the Mega Medic bag are below.
Product review video.
Video of MOLLE 2 pack modifications.
